


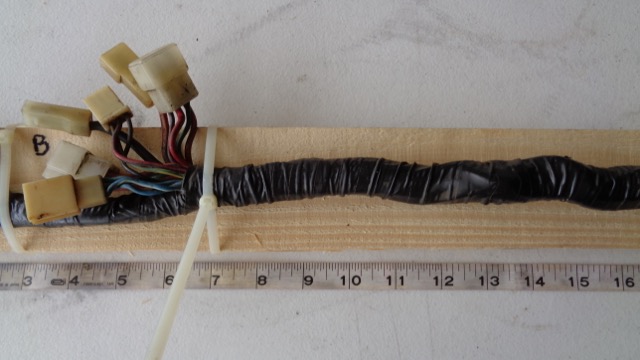
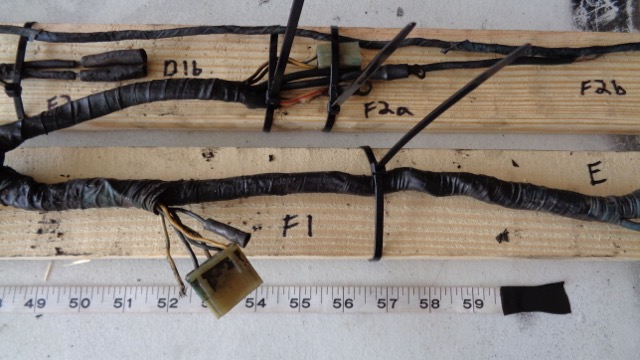
I have rebuilt all of the Datsun 240z Harnesses. Below are pics of how I define the harness, blueprint the harness, and rebuild the harness. I define the harness with Letters and Numbers. The main branch is designated with capital letter, as I move from the beginning (where it connects under dash) towards the end, a new branch is named with the next letter. A sub-branch off from a main branch is given a number. Another branch off a sub-branch is given a lower case letter. I use boards to help me blueprint a harness, please note in the photos the designated branch is defined on the board. If you see writing on the boards, the branch on that board is the correct branch, do not look at the other board and misinterpret the blue print. The actual blueprint shows all the wires and connectors and the naming convention will be defined later. I offer Harness Rebuild Services. Click for Details
Blueprinting a Datsun 240z 1972 Engine Bay wire harness 24012-E8800


Blueprint Definitions
Wire Color Designations
- B = Black
- W = White
- R = Red
- Y = Yellow
- G = Green
- L = Blue
First letter is Main Color of wire, second letter is the strip color: A Red wire with yellow strip would have the designation RY. I often use a lower case letter for strip.
Connector types and sizes
- The terminals for the plastic connectors are 2.8mm 6.3mm and 7.8mm
- There are spade terminals, male and female usually 6.3mm
- There are 4mm bullet connectors
Connector Naming Convention
- The terminals are defined as you looking at the front of the connector, wires in back.
- There are Male and Female connectors, designated M or F
- The # of terminals in a connector are designated by P and a number,
P3 is a connector plug with 3 terminals

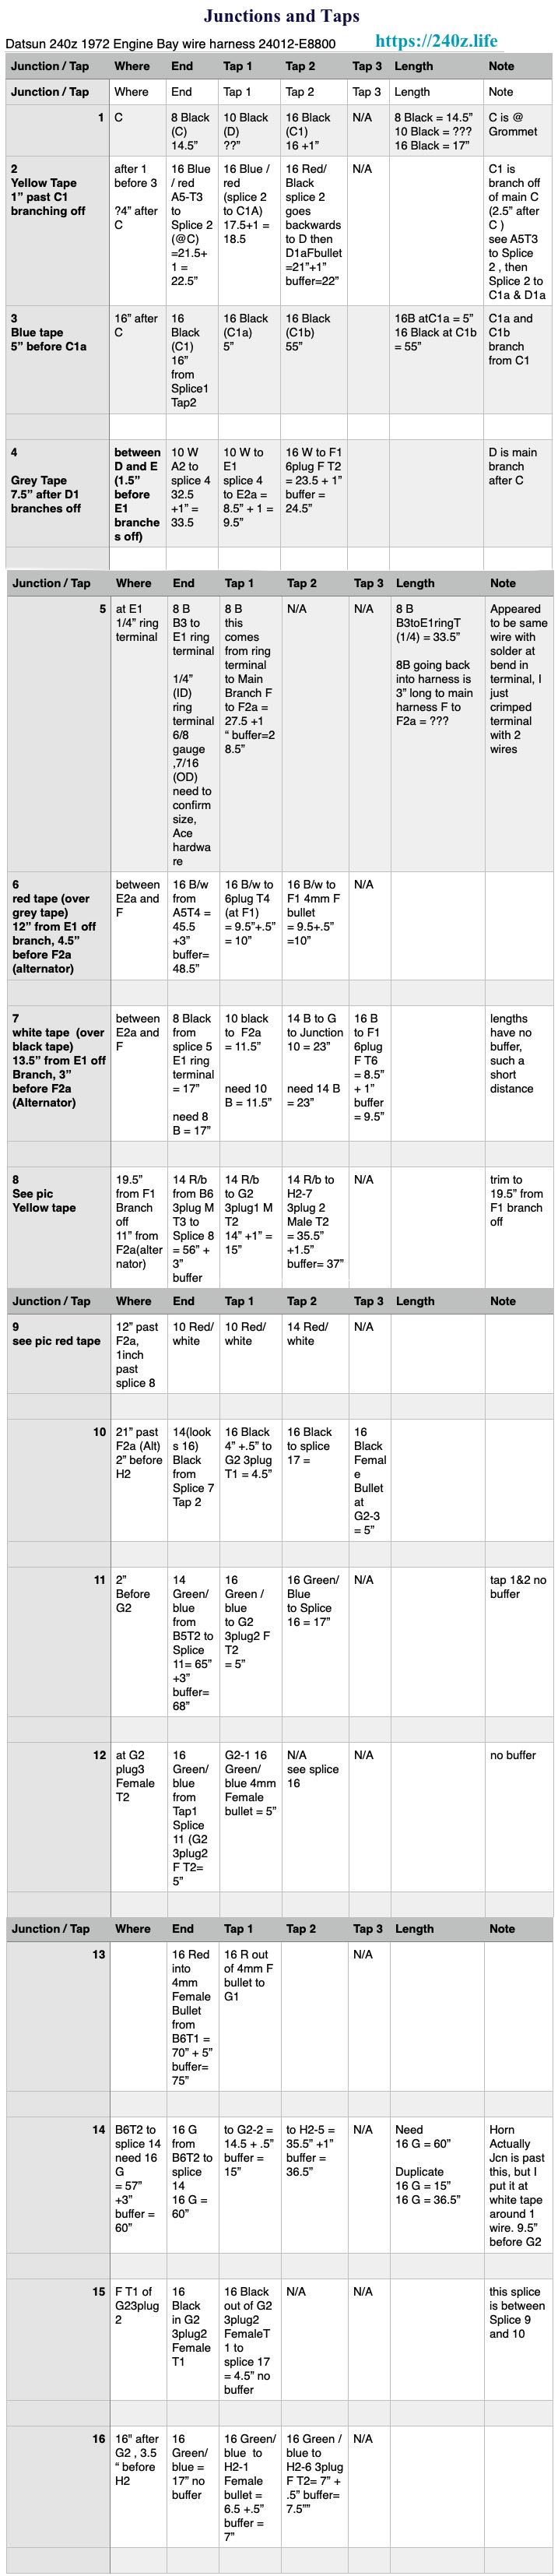
Junctions and Taps
There are 17 Junctions and taps within the harness itself. These are unseen, if harness is wrapped in loom tape. Honestly, you may need to dig around in the wires, look for tiny electrical tape sections. It gets a little confusing, no worries my chart is simple. The “END” is the main wire that is tapped.
The “TAPS” are the wires coming out of junction.
Wiring Harness Notes
A is 3 “ in front of B , 18.5” to Grommet, A is taped at start of B
B is 14.5” to Grommet , B is taped 3.25” towards grommet
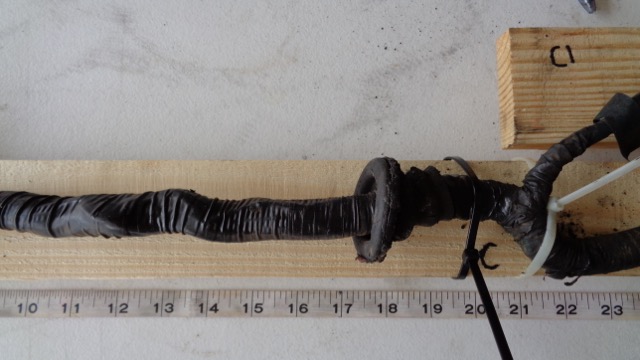
Grommet
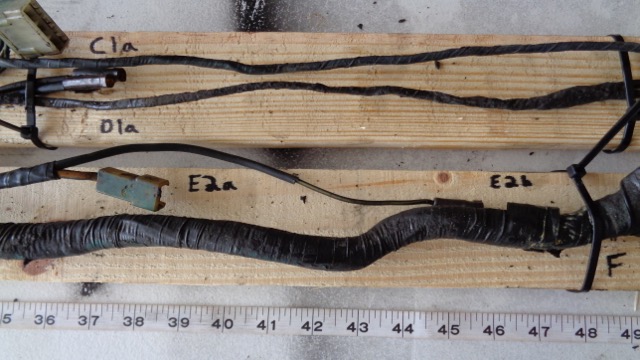
C is right after Grommet
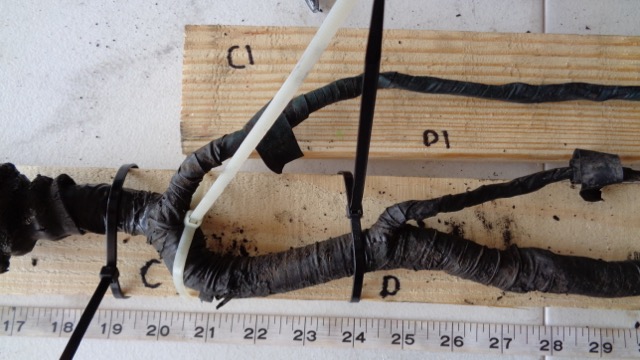
C1 is branch off of main (C to D)
C1a and C1b branch from C1
C1a is 21” +1” = 22” from Grommet
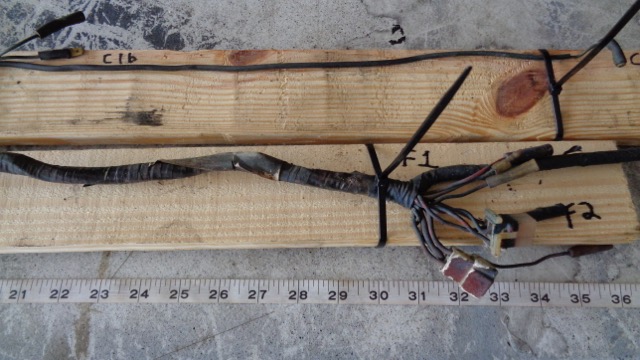
C1b is 65” +1” = 66” from Grommet
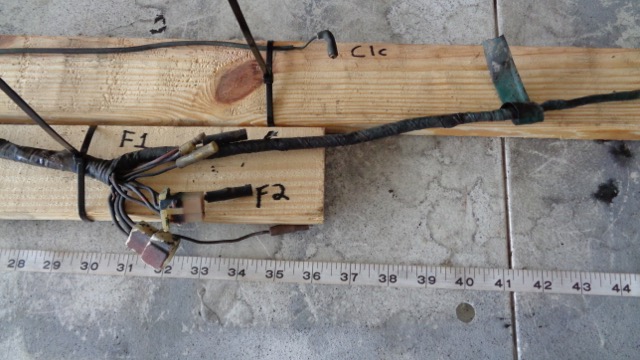
C1c is 60”=20”+1” = 81” from Grommet
C1a and D1a are parallel in alignment
D is main branch after C
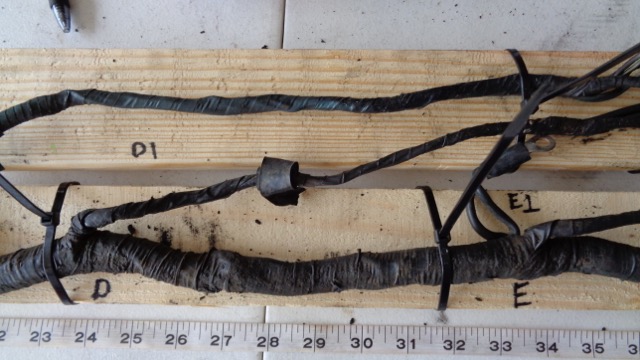
D1a is branch off of main (D to E)
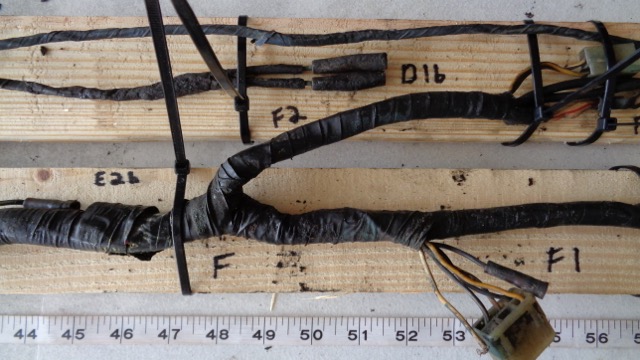
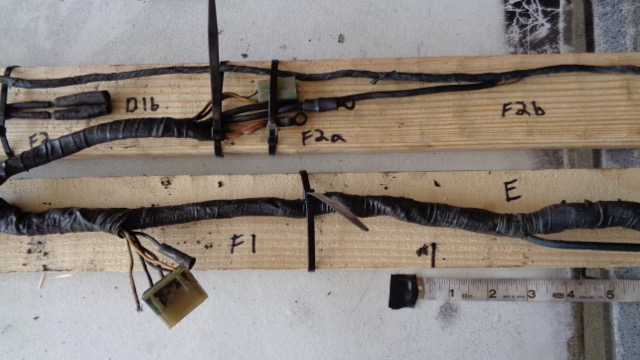
D1b is past D1a (same branch)
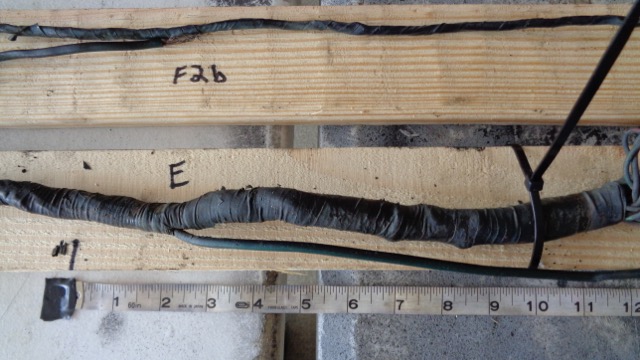
E is main branch after D
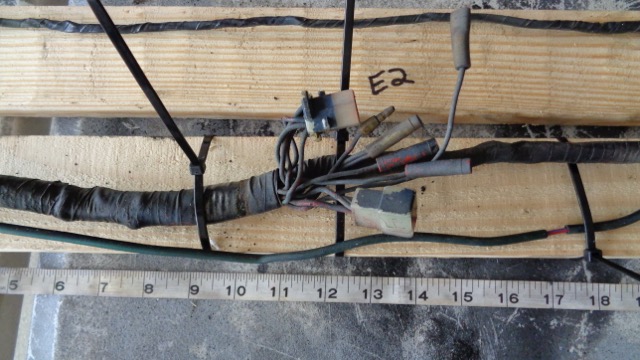
E1 E2a E2b are 3 separate branches that branch off at E, 9” after D1 branches off from D
F is main branch after E
F1 is Branch off of main branch F , branches off 2.5” past F
F1 and main G branch, branch 2.5” off of F
F2 is branch off of main branch F
F2a is Altenator
F2b is oil Pressure sending unit, need to be taped separate from F2a, see pics.
G is main Branch from F, 2.5” from F
G2a branch from G
G1 is continuation of Main Branch after G2a branch, where Passenger lights branch off
G2b (actually before G2a) is branch off 11.5” off of F2a (alternator)
no G2a
after G2b branches off main harness continues
G1 is continuation of main branch, branch where passenger lights branch off is G2
Main harness continues to H
18” extra large black sheath between G2 and H2
H2 branch is Driver lights
H1a is temp sensor wire (Y/w)
H1b is Ignition wires 16 B/w, 16 G/w, 16 B/w
Terminate 1 of the 16 B/w to 16 G/w this removes the drop resistor for the points distributor.
Hot B/W (12V) goes to + side of coil,
PLEASE NOTE BOTH B/W ARE PART OF THE SAME CIRCUIT. IF TACHOMETER DOES NOT WORK SWITCH THE B/W CONNECTED TO + COIL WITH B/W CONNECTED TO G/W.